

I'm so excited to FINALLY get to share this awesome project with you and the sweet collaboration that I got to be involved in with my friend and client, Carol!
So, those brick walls..Right?!!! Those dreamy ones that fit equally into those Farmhouse, Warehouse, NY Loft, and Old World looks that have us swooning and also flummoxed because ...alas, we don't have a brick wall or one to expose.
Well, hold onto your knickers 'cause this is a doozy of a result from just a few supplies that you may even have lying around in the basement corner, but even if you don't have them on hand, they are el cheapo to invest in. Trust me, this tactile and beautifully pleasing to the eye project is so do able and you may want to ask a friend over, put on some good music and chat away while working on this organic piece of art that is sure to become a unique focal point for your space as it did here.
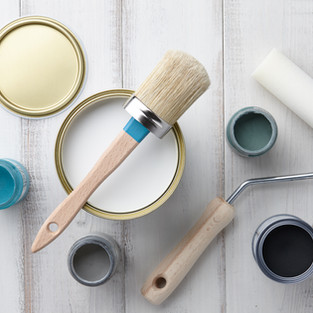
GATHER THE SUPPLIES...
*Any lightweight drywall compound. Lightweight is a great consistency for spreading.
*Blue Painter's tape
*Plastic putty knives of one or two small and smaller sizes works great
*A variety of paint brushes....from round, flat edge, and 2" brushes work well
*Choose 3-5 Coordinating colors...We chose a variety of grays for this project
These were color samples (from lowes under $4) we had these on hand.
We added black and white for grounding and highlight
You can even use leftover samples from around your home. You know you love em
because you already live with them.
*a paint roller handle with a foam roller
*a tarp/plastic to protect the floor


This project was so exciting because of the story of a friend who's whole mission is to create a space for serving others and making memories for her family for years to come.
I came in ready to go, jazzed about the project, spending time with Carol, and especially about Carol's why.
Step #1
MEASURE AND TAPE Horizontal Lines
A brick is about 8" long and 3" high so that is what we went with. I had the most narrow painter's tape I could find and we began to measure from the top of the wall down (a line of blue tape at the top of the wall, measure down 3", mark the line with a level and go from there)
Note: We tried to use a laser level. Didn't work because the wall was just a tad bowed and the wall, being so long...if you are a fraction off on one end, the laser was a foot off at the other so we scrapped it and truly measured, eye balled it and used a long level to mark lines and taped the wall horizontally.
*REMEMBER, YOUR TAPE LINES ARE YOUR GROUT LINES...YOU CAN PAINT THE WALL THE GROUT COLOR AHEAD OF TIME, BUT WHY BOTHER...WE GOT MESSY AND HAD TO CLEAN UP THOSE LINES ANYWAY SO...DON'T WORRY ABOUT THAT EXTRA STEP IF YOU DON'T WANT TO.
Step #2
Measure the length of the brick and mark your vertical lines and tape
ALTERNATE EACH ROW OF BRICK SO IT HAS A STAGGERED LOOK

Step#3
Visual Check
Just like a good piece of art in process, it's good to stand back, take a good look and see what stands out, where something feels too off. Squint your eyes and look at the shapes in the whole piece. I promise you, little adjustments will pop out and become obvious , but don't go for perfection.

It was lookin' good so forge ahead, we did. (Carol was a good picture taker, she gets all the credit for these process photos)
Step #4
Make Your Bricks!
Grab that plastic putty knife (plastic because it is flexible and can help you be creative)
*Tips
We are creating texture
*Spread it like icing and use the corner to create shallow and built up spots . You can even keep a real brick close for inspiration.
*I know it's a lot of bricks and it's kind of like creating 500 little abstracts, but it is so worth it in the end

Carol got in on the action and we had great talks and got to know each other better and each day, I left a better soul than I was the day before. Added bonus!

Step #5
Pull off the Tape
Once the wall is covered in drywall compound, begin to carefully remove the tape.
*Don't wait for it to dry
*Start at the top and work your way to the bottom
and Eureka! It kinda resembles a brick wall!
It's a messy deal but the drywall compound washes off your hands easily

Step #6
Paint the Bricks!
Ok, I know...this is the one thing that, depending on the size of your wall, could get a bit tedious, but once you do a few, you will develop a rhythm. Here are a few tips that may help.
*Gather your samples and place dollops of all of them on your pallet (paper plate works great)
*Use different brush sizes and create depth by scrubbing the darker color into those deep spots and middle tone colors on the raised places. Don't make them uniform, just paint them in.

We stood back and looked and decided that we'd do more detail on the bricks at eye level and throw darker ones in here and there as well as a few lighter ones.
Variety!!!
See How messy and into the grout we got? It's ok,

Step #7
Dry Brush
Because we created depth both in texture and with paint, now we get a clean brush and Dry Brush

What is Dry Brushing?
*Dip clean 2" brush into White or light paint you are using
*Clean off most of the paint on a paper towel until the brush is pretty dry
(I know, why dip it in the paint and wipe it off? well, because enough paint stays in the brush to do the needed effect)
*lightly, with very little
pressure, swipe the brush across the brick texture leaving just a bit of white paint to highlight the most raised spots revealing the relief of your brick. Now you'll have another layer of depth.

Step #8
Paint in the Grout lines
Simply take a brush ( a flat edge brush works great) and use a grout color from your colors to use as your grout color and simply paint in and clean up those lines.
*You can add sand to your grout paint (we did) and it'll give you more of a realistic texture but you don't have to to love the look.

Once the grout lines are done
Step back again and take a look
One thing we noticed and that Carol desired was more of a realistic look so we did add some staining with some watered down paint in the a few spots in the grout here and there.
That's just a feel and an organic decision that really made a difference.

All in all, what a blessing it is to create with someone who wanted an artist collaboration. Carol had a vision of the feel she wanted and I was able to freely explore options with her and create and even navigate course corrections as inspiration struck.
This is truly my preferred way to design a space and I want to thank my sweet friend, Carol, for allowing me the opportunity to do this with her as I know this will be the background for memories made for years to come.
What a privilege.
Blessings, Tina

I will have a follow up blog to talk about why this room works. COMING SOON

Please feel free to ask questions.
Comments